29 Creative Easter Crafts for Adults to DIY
Looking to add some creative flair to your Easter celebrations? Dive into these 29 DIY crafts specifically designed for adults that will bring a touch of personal charm to your holiday festivities. From elegant decor to thoughtful gifts, there’s something here to inspire everyone, whether you’re a crafting novice or a seasoned pro.
Easter Egg Hunt Map

Planning an Easter egg hunt? A fun way to kick off the festivities is to create a custom Easter Egg Hunt Map. The image showcases a detailed map that features various locations and hints for hidden eggs. It adds an exciting element to your egg hunt, making it feel like a treasure hunt.
The map is laid out on a vibrant picnic blanket, surrounded by colorful plastic eggs. The design includes playful landmarks and symbols, guiding participants to different egg locations. It’s not just about finding eggs; it’s about the adventure and discovery along the way!
Using a map can help keep the hunt organized. You can mark spots where eggs are hidden and even create clues for each location. This adds a layer of strategy and enhances the fun for both kids and adults. Everyone will love following the map as they search for surprises!
Paper Mache Easter Baskets
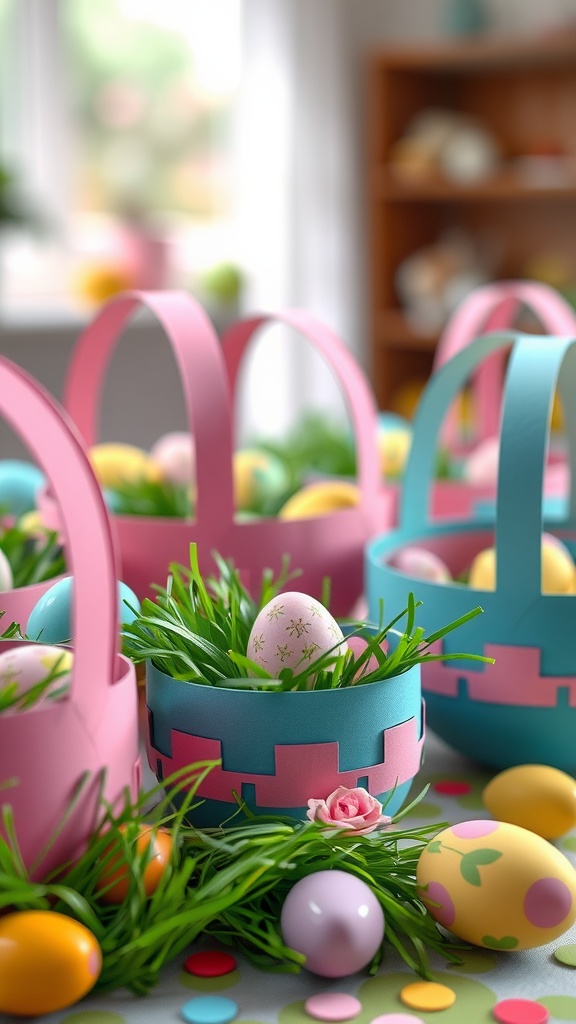
Create delightful paper mache Easter baskets that not only look charming but also add a personal touch to your holiday decorations. These baskets can be a fun project for adults, allowing you to express your creativity while crafting something useful.
The image showcases a vibrant collection of baskets in soft pastel colors, filled with colorful Easter eggs and lush green grass. The playful design of these baskets makes them perfect for an Easter celebration, whether you’re using them for an egg hunt or as decorative centerpieces.
To make your own paper mache baskets, you’ll need some basic materials: strips of newspaper, a balloon, flour, water, and paint. Start by mixing flour and water to create the glue. Inflate the balloon to your desired basket size, then dip the newspaper strips into the glue and layer them over the balloon. Once dry, pop the balloon, and you’ll have a sturdy basket. Finish by painting the basket in cheerful colors, and don’t forget to fill it with faux grass and colorful eggs for that festive touch!
Natural Dye Easter Eggs
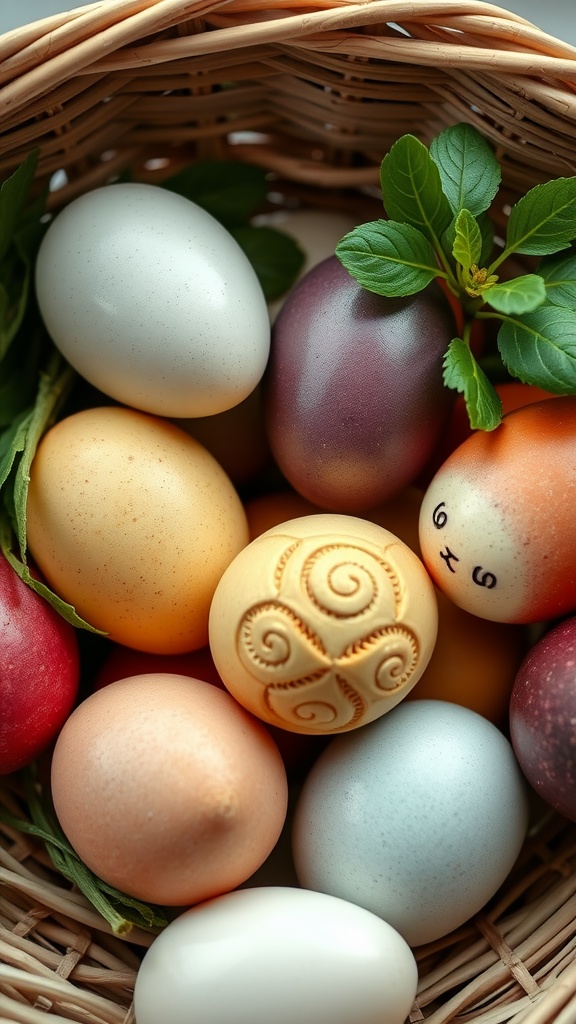
Creating natural dye Easter eggs is a fun and eco-friendly activity perfect for adults. The image showcases a delightful basket filled with beautifully dyed eggs in various colors and designs. Each egg tells a story, reflecting the care and creativity that goes into the dyeing process.
To get started, you’ll need a few simple ingredients. Common natural dyes can be made from items like red cabbage, turmeric, and beet juice. Begin by boiling these materials in water to release their colors. Once cooled, strain the liquid and use it to dye your eggs. Dipping for longer will deepen the hues, allowing for a range of shades.
Don’t forget to have some fun with designs! You can use wax or rubber bands before dyeing to create patterns. Once your eggs are colored and dried, you might consider adding a finishing touch with some natural leaves or flowers for decoration. The combination of nature’s colors and personal creativity will make each egg unique and special.
Eggshell Mosaic Art
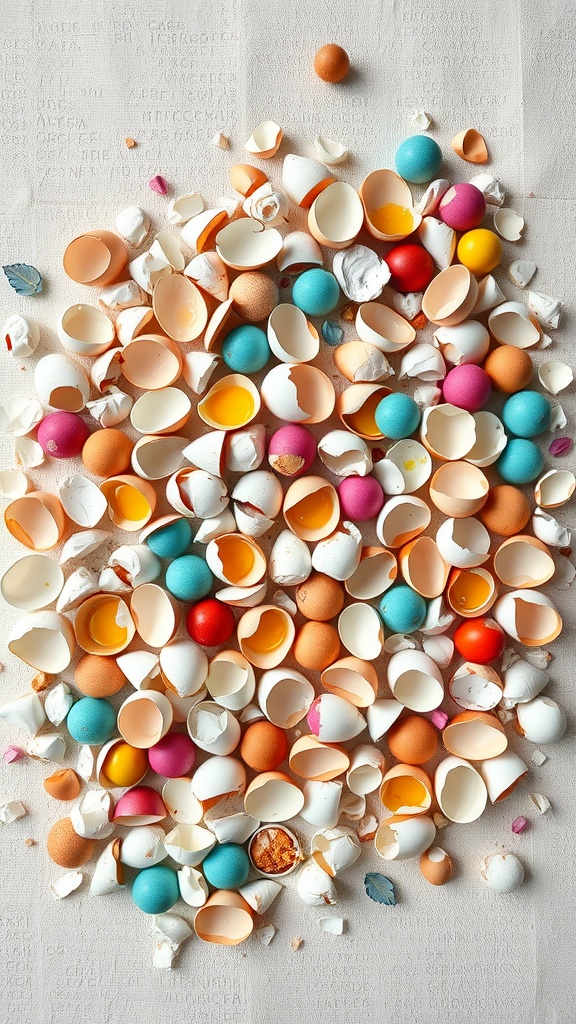
Eggshell mosaic art is a delightful way to repurpose eggshells into beautiful creations. Imagine a colorful collection of broken eggshells scattered together, just like in the image. Each shell holds its own charm and character, making it perfect for crafting.
Start by gathering your leftover eggshells. After a fun day of decorating Easter eggs, save the shells instead of tossing them. Clean them gently to remove any residue and allow them to dry completely. This is the perfect opportunity to get creative!
Once you have a good selection of colorful shells, you can create stunning designs on canvas or wooden boards. Arrange the shells to form patterns, flowers, or even abstract art. The variety of colors, from vibrant blues to soft pastels, adds a unique touch to your masterpiece.
To finalize your art piece, simply glue the shells down and seal them with a clear varnish. This will protect your creation and give it a glossy finish. Eggshell mosaic art is not just fun; it’s a fantastic way to express your creativity while celebrating the season!
Floral Easter Egg Wreath
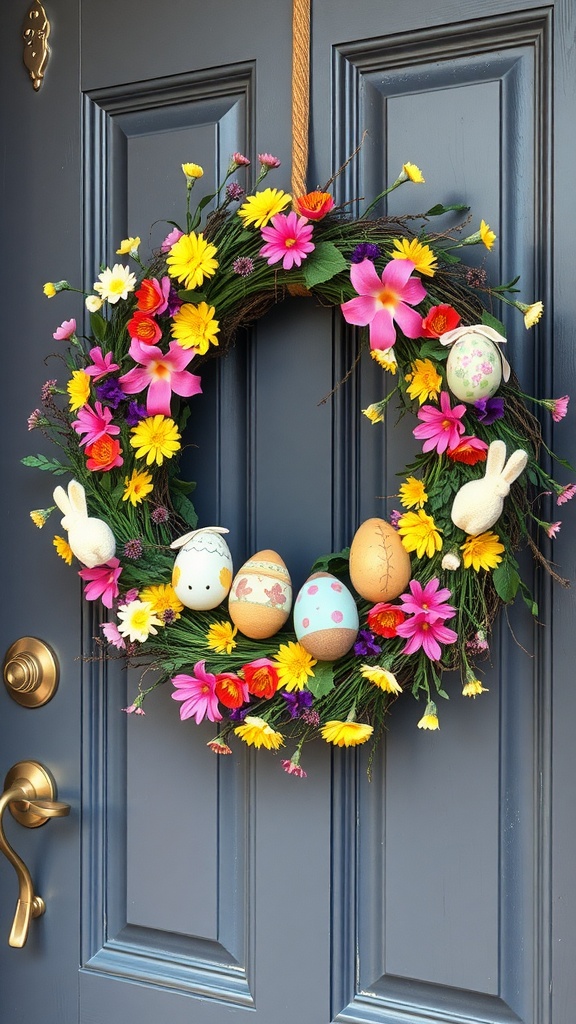
This Floral Easter Egg Wreath is a cheerful addition to your spring decor. It brightens up any space and welcomes the season with open arms. Made with colorful flowers and decorated with hand-painted eggs, it’s a delightful way to celebrate Easter.
The wreath features an array of vibrant flowers, including yellow daisies and pink blooms. These flowers create a fresh and lively feel. The eggs, in pastel shades and fun patterns, add a festive touch. You can even spot a couple of cute bunny figures peeking out.
Creating this wreath at home is simple! Gather materials like a grapevine wreath base, artificial flowers, colorful eggs, and some glue. Arrange the flowers and eggs to your liking, and secure them tightly. Hang your creation on your front door or above a fireplace for a warm seasonal greeting.
Fabric Covered Easter Eggs
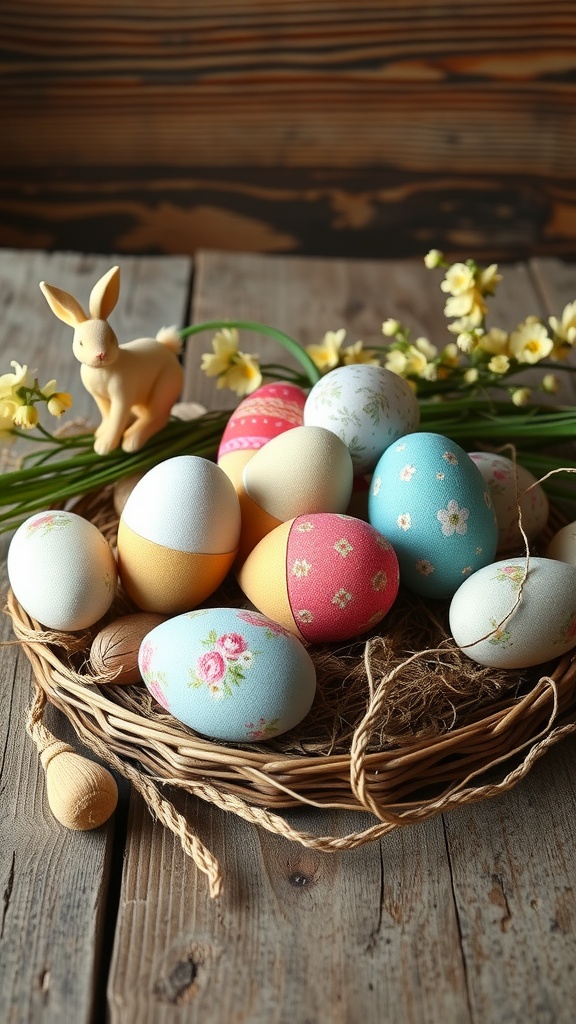
Fabric covered Easter eggs are a charming twist on traditional egg decorating. They bring a cozy, handmade touch to your holiday decor. These eggs can be customized using various fabrics, making them perfect for any style or theme.
To create these delightful eggs, you’ll need some craft eggs, fabric scraps, scissors, and a glue gun. Start by cutting the fabric into small pieces that will easily wrap around your eggs. Apply a thin layer of glue to the egg and carefully place the fabric over it, smoothing out any wrinkles as you go.
Once you’ve covered the egg, let it dry completely. You can embellish further with ribbon, lace, or even buttons for added flair. The result is a beautiful display that’s not only festive but also a fun activity for adults to enjoy during the Easter season.
Displaying these fabric covered eggs in a basket or on a decorative stand will brighten up any space. Pair them with some spring flowers and a cute bunny figure, like the one in our image, for a lovely centerpiece. Get creative and enjoy the process of making these unique decorations!
Hand-Painted Wooden Eggs
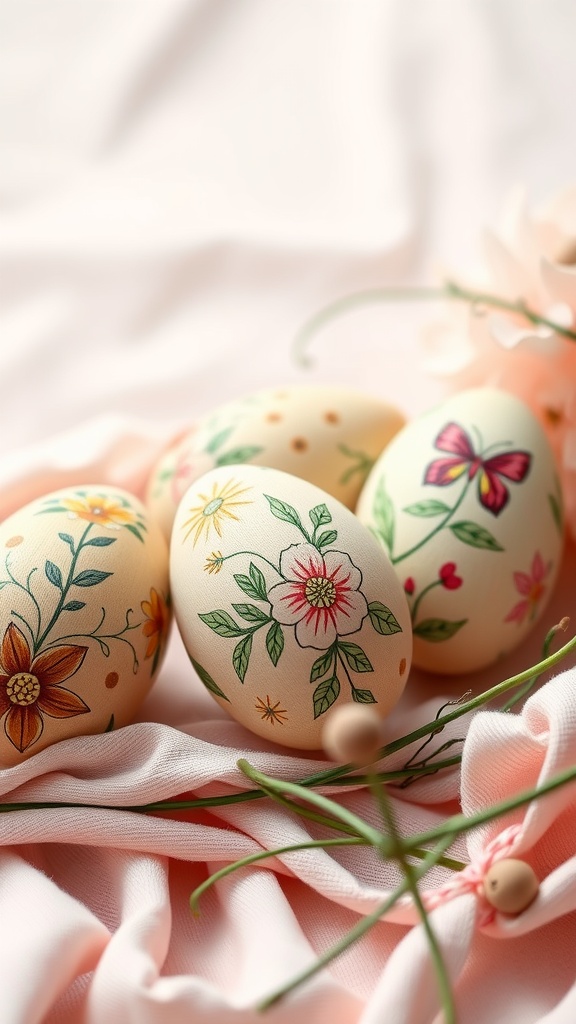
Hand-painted wooden eggs are a delightful craft for adults, especially during Easter. They offer a chance to express creativity while adding a personal touch to your holiday decor. The image showcases beautifully painted eggs adorned with floral designs and soft colors, resting on a delicate pink fabric.
Creating these eggs is a simple yet enjoyable process. Start by gathering wooden eggs, paint, and brushes. Choose your favorite colors and patterns to make each egg unique. From intricate flowers to playful dots, the possibilities are endless.
Once the paint dries, you can display your wooden eggs in a basket or use them as table centerpieces. They not only enhance your Easter festivities but also serve as charming decorations year after year. This craft is a lovely way to spend time with friends or family, making lasting memories as you create together.
Easter Bunny Table Centerpiece
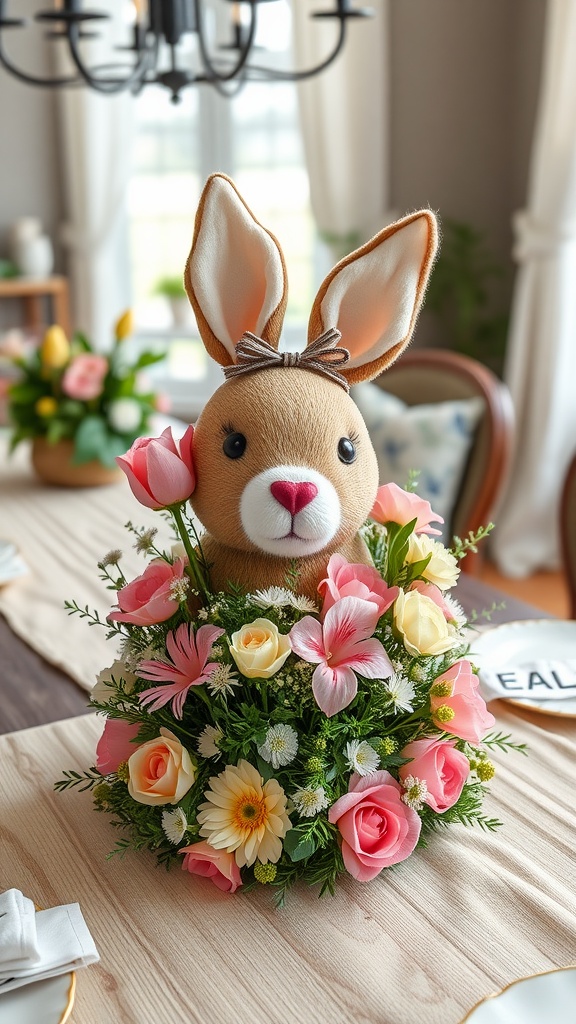
The Easter Bunny table centerpiece is a delightful addition to any festive table setting. This charming decoration combines a cute bunny figure with a vibrant floral arrangement, making it a perfect choice for Easter celebrations.
The bunny sits proudly in the center, surrounded by a mix of colorful flowers like pink roses, cheerful daisies, and soft yellow blooms. The combination of the plush bunny and fresh flowers creates a warm and inviting atmosphere, ideal for gathering with family and friends.
To make your own Easter Bunny centerpiece, you can start with a simple bunny figure, which can be store-bought or handmade. Then, gather a variety of flowers in spring colors. Arrange the flowers in a nice vase or a basket, placing the bunny at the center to create a focal point. This DIY project not only beautifies your table but also adds a personal touch that guests will appreciate.
Easter Egg Tree
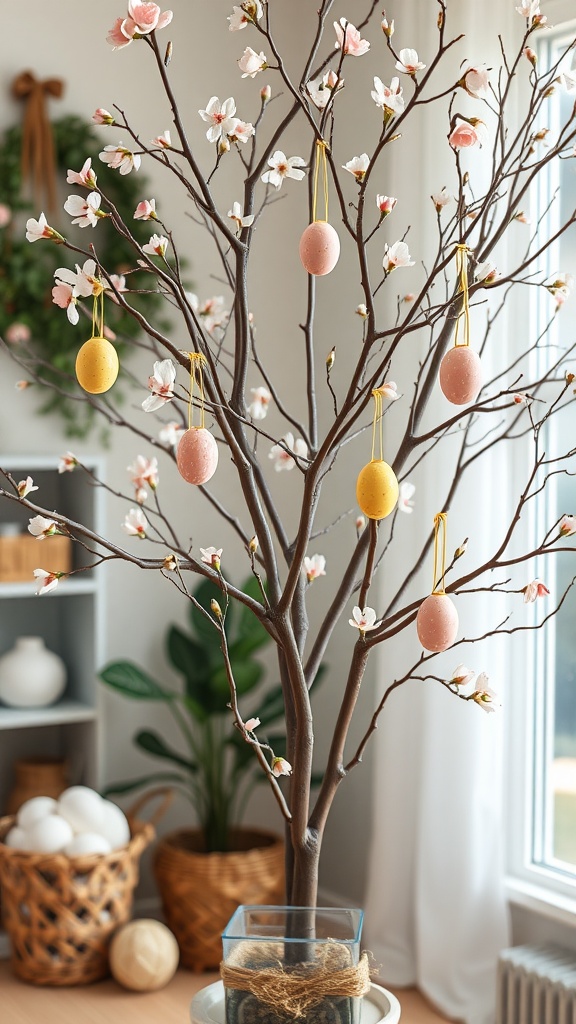
The Easter Egg Tree is a delightful craft that brings the spirit of spring into your home. It features a bare branch adorned with pastel-colored eggs and delicate blossoms, creating a cheerful display. The combination of soft pink flowers and bright yellow and pink eggs adds a refreshing touch to any room.
This craft is not only visually appealing but also easy to put together. You can use a real branch or one made from artificial materials, depending on your preference. Hang the eggs using colorful ribbons for an extra pop of color.
To make your own Easter Egg Tree, gather a few materials. You will need a branch, a vase or container, some floral foam or rocks for stability, and decorative eggs. You can find eggs made from various materials, like plastic, wood, or even paper mâché.
Start by securing the branch in your chosen container. Then, cut the foam or fill the bottom with rocks to keep it steady. Finally, hang the eggs on the branches, spacing them out for a balanced look. You can even add more decorations like ribbons or additional flowers if you like.
Easter Gnome Craft
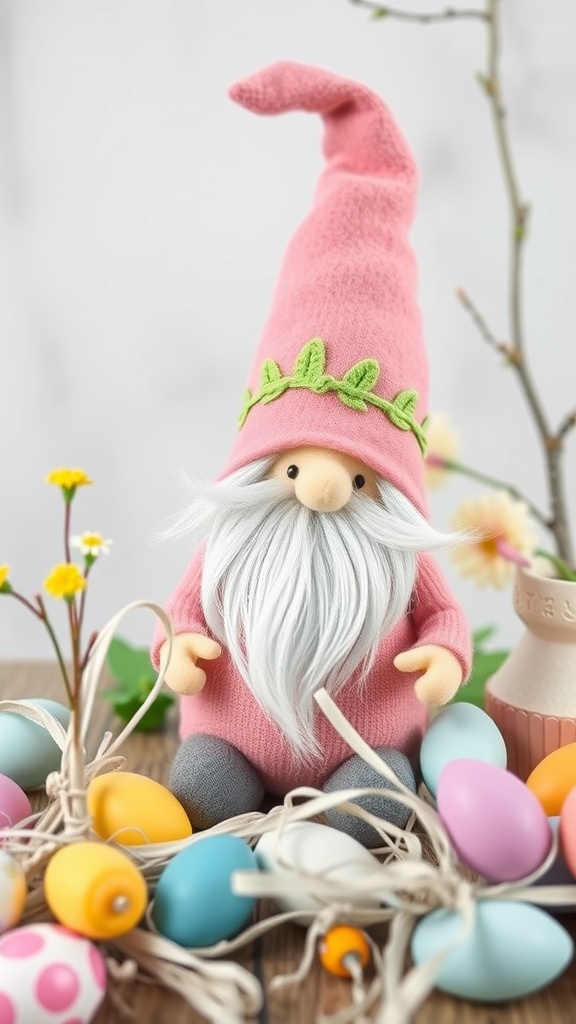
The Easter Gnome craft is a delightful way to bring a bit of whimsy into your holiday decor. As seen in the image, this charming gnome features a soft pink hat adorned with green leaves. The fluffy white beard adds a touch of character, making it a perfect representation of festive spirit.
Surrounded by colorful eggs and delicate flowers, this gnome embodies the joy of Easter. Crafting your own gnome can be a fun project. You can use materials like felt, yarn, and small wooden balls to create a similar character.
To get started, gather your supplies: a sock or fabric for the body, a small wooden ball for the head, and craft glue. Simply fill the sock with rice or beans, shape it into a gnome form, and attach the wooden ball on top. Dress it up with your choice of fabric for the hat and add embellishments like flowers and eggs to capture that Easter vibe.
Burlap and Lace Easter Decor
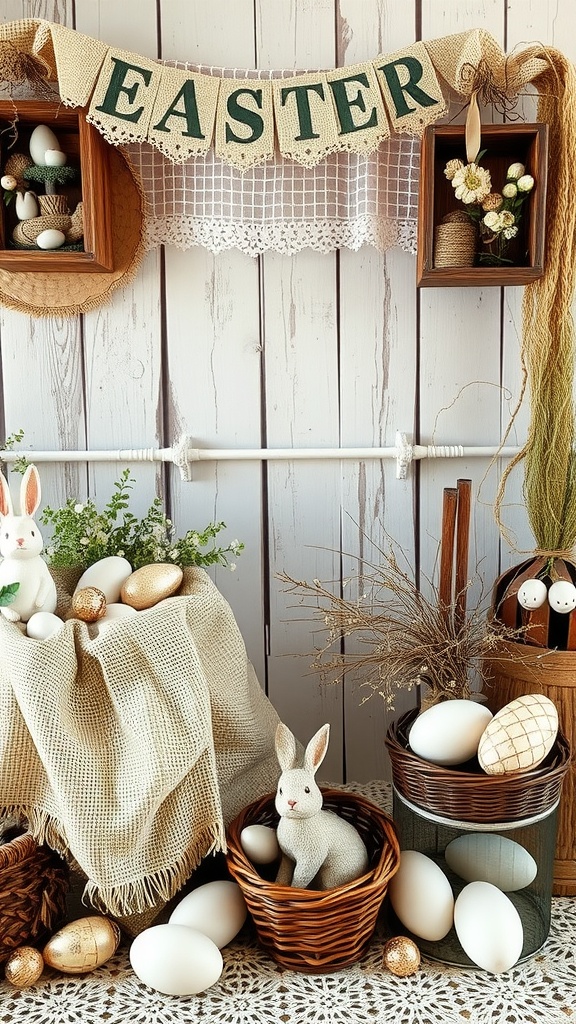
Burlap and lace create a lovely combination for Easter decor, bringing a touch of rustic charm to your home. In this image, you can see a banner that spells out ‘EASTER’ made from burlap, which adds a natural feel to the festive setting.
The background showcases wooden panels that provide a warm and inviting backdrop. With items like woven baskets and decorative eggs, this display captures the essence of the holiday in a simple yet elegant way.
A soft, cream-colored lace is layered above the burlap, softening the look and adding a hint of sophistication. The arrangement features small floral accents and a cute bunny figure, making it perfect for Easter.
Incorporating elements like these into your decor can enhance the festive spirit. You could easily recreate this look by using burlap for table runners or wall hangings, alongside lace for layering any surface. It’s an enjoyable DIY project that brings joy to decorating for the season.
Easter-Themed Candles
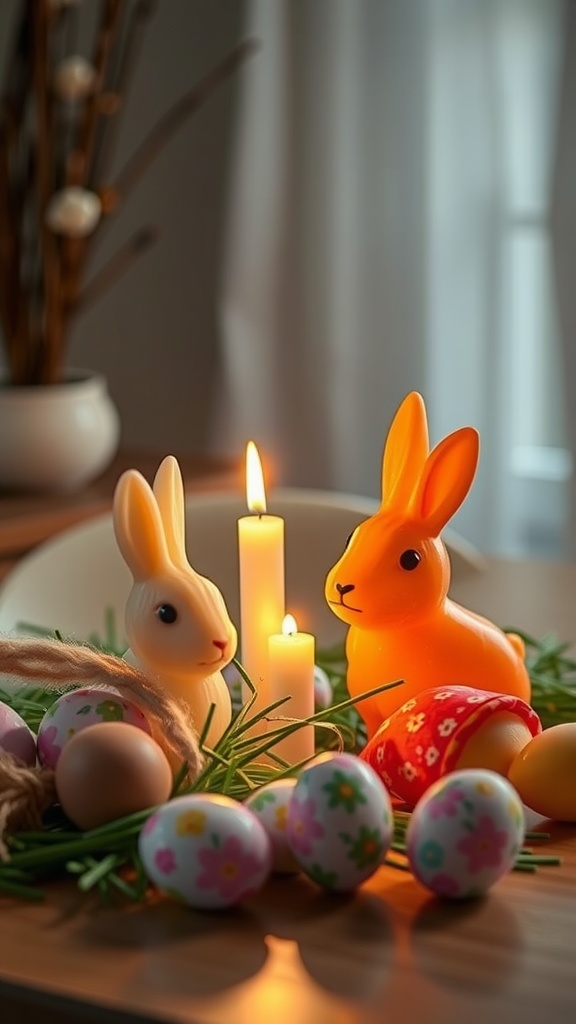
Easter-themed candles are a delightful way to bring warmth and charm to your holiday decorations. The image features a cozy setup with two adorable bunny candles, adding a playful touch to the scene. These candles can serve as both decor and a source of soft light, creating a lovely atmosphere for your Easter celebrations.
The centerpiece showcases a few beautifully decorated eggs nestled among greenery, further enhancing the festive vibe. Using candles in your Easter crafts is not just about aesthetics; it also creates a welcoming space for family and friends to gather and enjoy the holiday.
Creating your own Easter-themed candles can be a fun DIY project. You can choose colors and designs that fit your style. Whether you use molds shaped like bunnies or decorate plain candles with Easter motifs, the options are limitless. This craft allows for personalization, making your decor even more special.
Quilled Paper Easter Cards
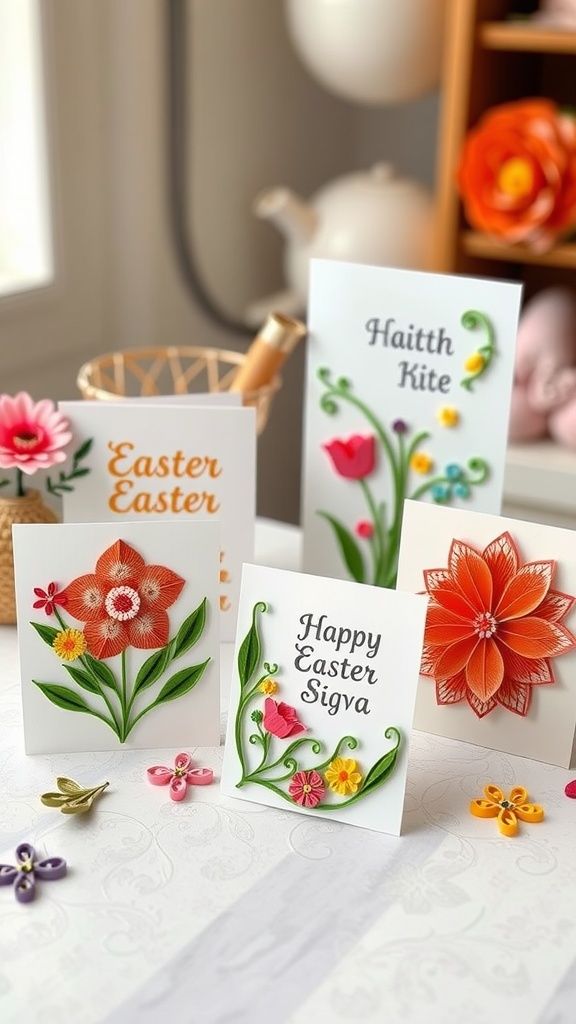
Quilled paper Easter cards are a delightful way to express your creativity while celebrating the holiday. In the image, you can see several beautifully crafted cards, each adorned with vibrant quilled flowers and elegant lettering. These cards add a personal touch to your Easter greetings.
The process of creating quilled cards begins with a few basic supplies: quilling paper strips, a quilling tool, glue, and scissors. You simply roll the strips into different shapes and sizes to form flowers, leaves, and other decorative elements. It’s a relaxing activity that can be enjoyed alone or with friends.
Each card showcases unique designs, from blooming flowers to cheerful messages like ‘Happy Easter’ and ‘Easter Easter.’ This adds a festive spirit to your creations. You can take inspiration from the cards in the image or let your imagination run wild!
Not only are these quilled cards lovely to send, but they also make charming keepsakes for those who receive them. They can be displayed as part of Easter decorations or saved as a special memory. So grab your quilling tools and get started on your own beautiful Easter cards!
Beaded Easter Egg Ornaments
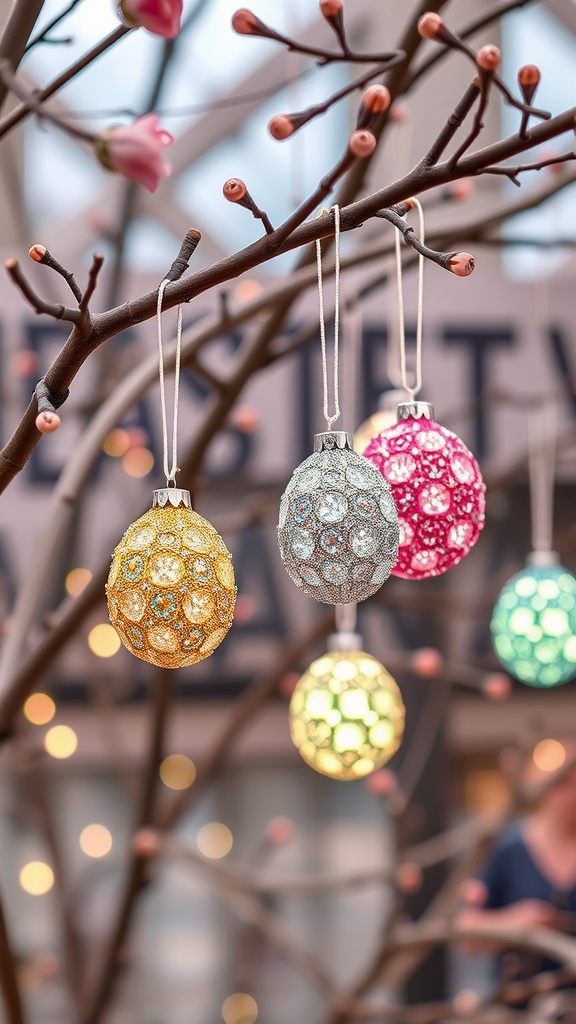
Beaded Easter egg ornaments are a delightful way to bring some sparkle to your spring decorations. These crafts are not only fun to make but also add a charming touch to your Easter festivities. Imagine a beautiful branch adorned with these colorful eggs, catching the light and creating a festive atmosphere.
The image showcases an array of beaded eggs hanging from a branch, featuring vibrant colors like yellow, pink, and silver. Each egg is carefully crafted, showcasing intricate beadwork that gives them a unique look. The soft background highlights the ornaments, making them the centerpiece of the display.
To create your own beaded Easter egg ornaments, you’ll need some clear plastic eggs, a variety of colorful beads, strong glue, and ribbon for hanging. Start by applying glue to the surface of the egg and then sprinkle or adhere the beads in a pattern of your choice. Once they dry, attach a ribbon to hang them. This craft is perfect for both individuals and groups, making it a fun activity to share with friends or family.
Easter-Themed Suncatchers
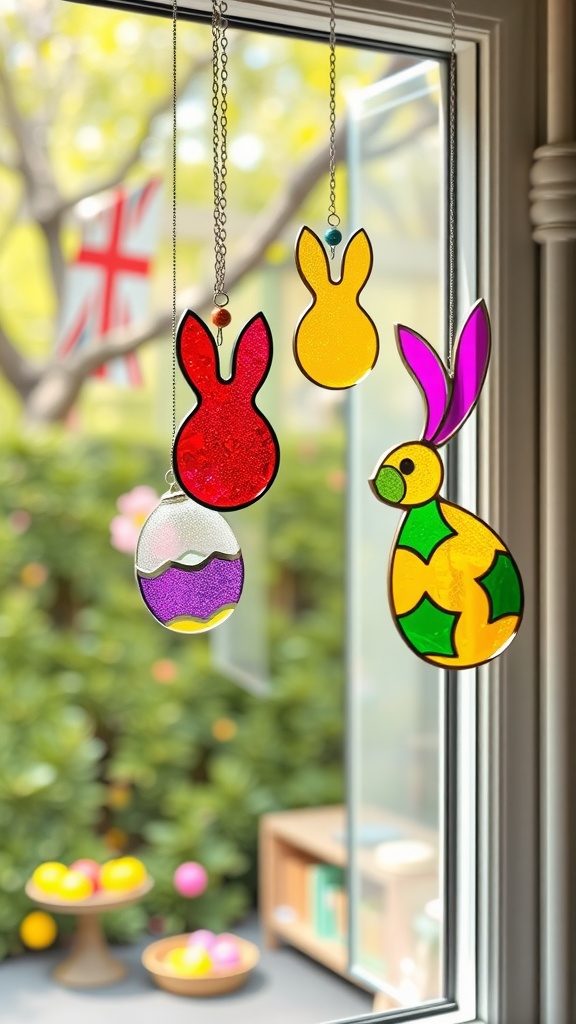
Creating Easter-themed suncatchers is a fun activity that adds a splash of color to your home. These bright decorations catch the light beautifully, making your windows sparkle with festive cheer. The image shows a variety of suncatchers shaped like bunnies and eggs, perfect symbols of Easter.
Hanging in a sunny spot, these suncatchers not only brighten up your space but also serve as a delightful reminder of the season. You can see vibrant colors like red, yellow, and green, each suncatcher showcasing unique designs. It’s a charming way to celebrate Easter while enjoying a relaxing craft.
To make your own suncatchers, you’ll need some basic supplies like transparent plastic sheets, paint, and a pair of scissors. Cut out your chosen shapes, decorate them with colorful paints, and let them dry. Once they’re ready, hang them in your windows to create a cheerful atmosphere.
Painted Terracotta Pots
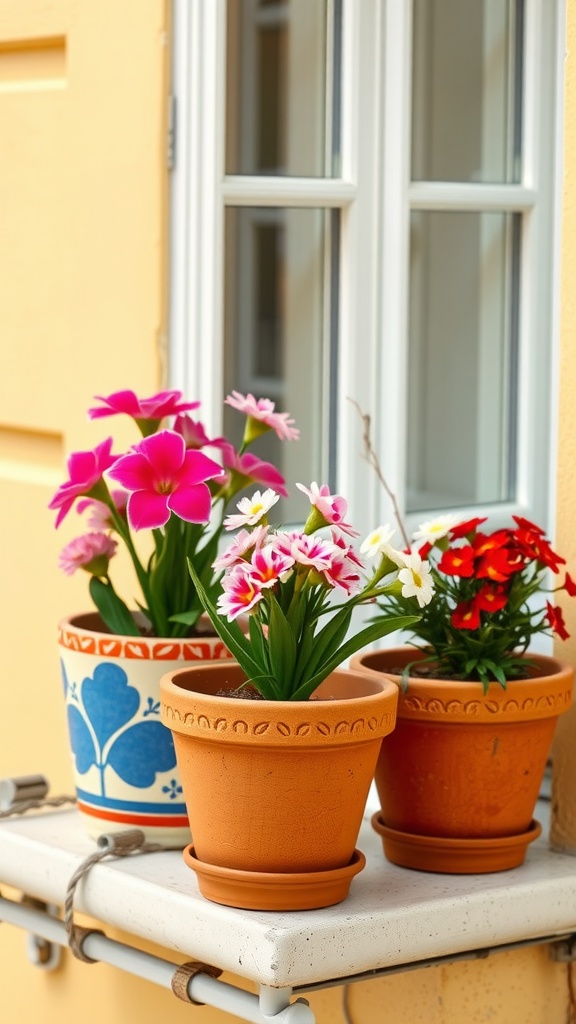
Painted terracotta pots are a fun and creative way to celebrate Easter while adding a splash of color to your home. These pots can be personalized to reflect your style and the season’s spirit. With just a few basic supplies, you can turn simple terracotta pots into charming decorative pieces.
Start with some plain terracotta pots. You can find these at most craft stores or garden centers. Once you have your pots, gather some acrylic paints in spring colors like pastels or bright hues. A paintbrush, painter’s tape, and a sealant will also come in handy.
Begin by cleaning the pots and letting them dry completely. Use painter’s tape to create fun patterns—stripes, dots, or even floral designs. Then, paint the exposed areas with your chosen colors. After the paint dries, apply a sealant to protect your artwork from the elements.
Fill your newly decorated pots with vibrant flowers or fresh herbs to bring them to life. Place them on windowsills, porches, or garden tables for a lovely display that complements your Easter celebrations.
Not only do these painted terracotta pots add beauty to your space, but they also make for a delightful DIY project to enjoy alone or with friends. So grab your supplies, unleash your creativity, and make this Easter special with your unique painted pots!
Easter Bunny Silhouette Art
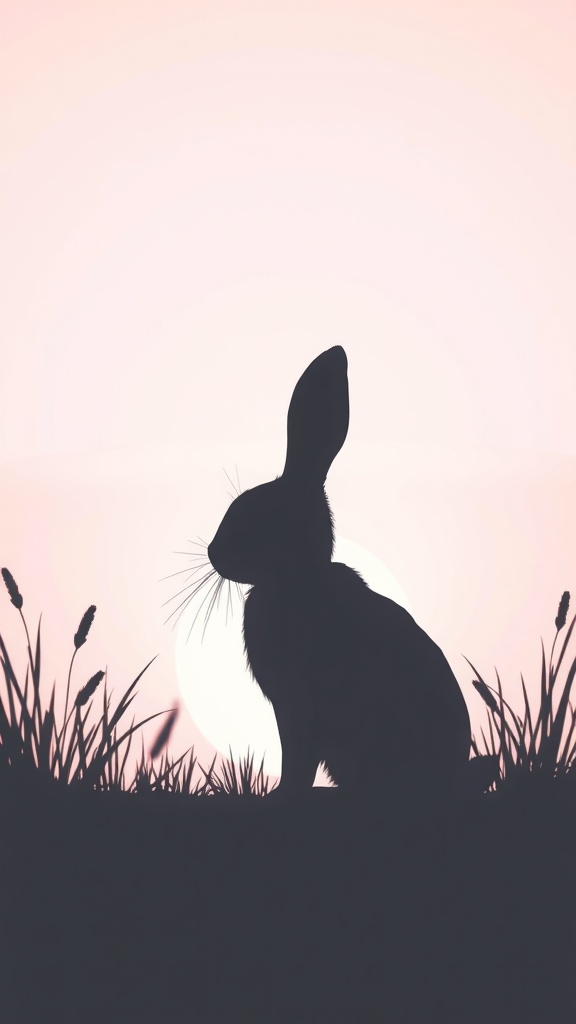
This Easter Bunny silhouette art captures a charming scene that perfectly embodies the spirit of the festive season. The image features a beautifully crafted silhouette of a bunny sitting gracefully in a gentle landscape, surrounded by soft grasses and a warm, glowing background. The colors transition from soft pinks to deeper hues, giving a serene feel to the artwork.
Creating your own Easter Bunny silhouette can be a fun and relaxing DIY project. All you need is some black paper, a pair of scissors, and a canvas or a piece of cardstock as your base. Simply cut out the shape of a bunny and position it against your chosen background.
Once you’ve made your silhouette, you can personalize it by adding decorative elements like flowers or colorful Easter eggs around the edges. This artwork can serve as a lovely addition to your Easter decorations, bringing a touch of whimsy and charm to your home.
Displaying your creation is just as easy. You can frame it or hang it as it is, allowing the silhouette to stand out against the backdrop. It’s a simple yet lovely way to celebrate Easter through art.
Macrame Easter Wall Hanging
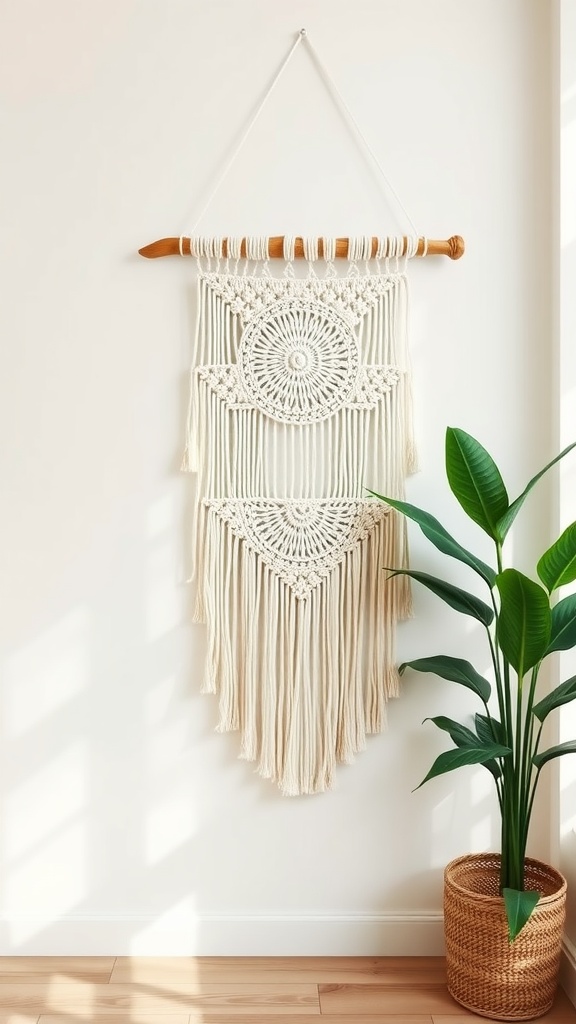
Creating a macrame Easter wall hanging is a fun and engaging way to add some festive flair to your home. This craft combines the beauty of macrame with the joyful spirit of Easter. The image shows a beautifully crafted wall hanging made from soft, cream-colored cord, featuring intricate patterns and fringes that flow elegantly downwards.
The design includes circular motifs and geometric shapes, making it an eye-catching piece for any wall. Hang it in your living room or entryway to welcome guests with a touch of spring. Pairing the wall hanging with some greenery, like the potted plant in the image, enhances the overall aesthetic, bringing a fresh, natural vibe to your space.
This Easter craft is not only decorative but also a wonderful project to share with friends or family. Grab some macrame cord, a wooden dowel, and follow a simple pattern to create your own unique piece. It’s a perfect way to get into the holiday spirit while embracing your creative side!
Easter Egg Puzzles
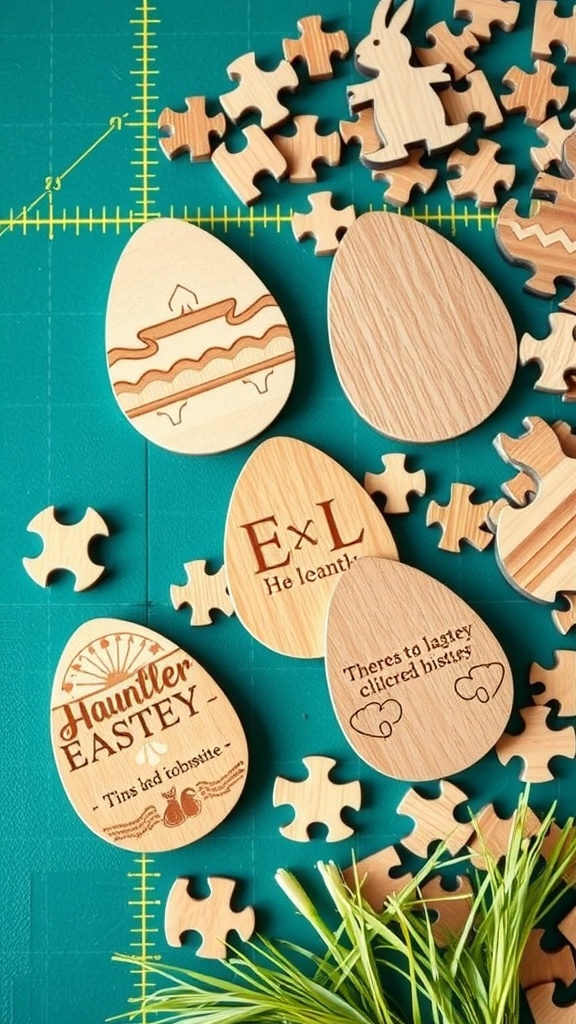
Let’s talk about Easter egg puzzles! This delightful craft combines the fun of puzzles with the joy of Easter decorations. Imagine creating unique wooden egg-shaped pieces, each beautifully etched with playful designs. These pieces can be assembled to form a lovely Easter display or even a fun family activity.
The image showcases several wooden eggs, each featuring different patterns and inscriptions. They sit on a vibrant green cutting mat, surrounded by small puzzle pieces. This setup invites creativity and encourages hands-on interaction. It’s a great way to spend time with family or friends as you piece together your custom Easter theme.
Not only do these puzzles look charming, but they also serve as a lovely centerpiece during Easter gatherings. You can personalize each egg with names or messages, adding a special touch to your celebration. Gather your craft supplies and get ready to enjoy a delightful afternoon of puzzle-making!
Tissue Paper Flower Eggs
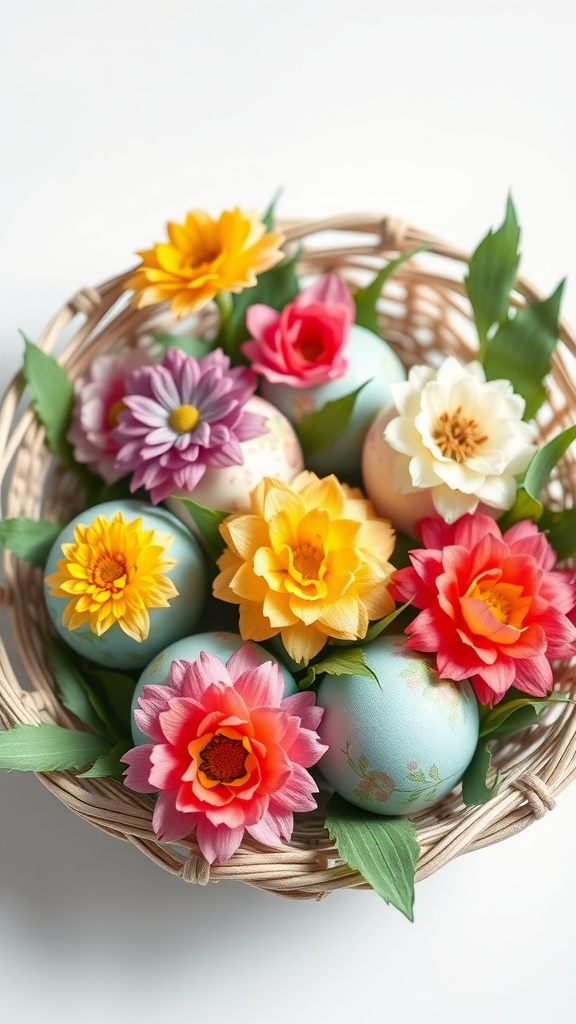
Spring is the perfect time to bring some color and creativity into your home with tissue paper flower eggs. This fun craft combines the charm of decorated eggs and the beauty of flowers, making it an enjoyable activity for adults. You can create vibrant eggs that not only look lovely but also add a personal touch to your Easter decor.
In the image, we see a beautiful basket filled with eggs that are adorned with colorful tissue paper flowers. The variety of flowers, including bright sunflowers and soft pink blooms, brings a cheerful vibe to the arrangement. The eggs themselves are painted in soft pastel colors, creating a pleasing contrast with the bold flowers.
To make your own tissue paper flower eggs, start by gathering some supplies. You will need plastic or hard-boiled eggs, tissue paper in various colors, scissors, and glue. Cut the tissue paper into petal shapes and glue them onto the eggs, layering them to create a full flower look. Once done, display your creations in a basket or use them as table centerpieces. It’s a delightful way to celebrate the season and a wonderful craft to share with friends!
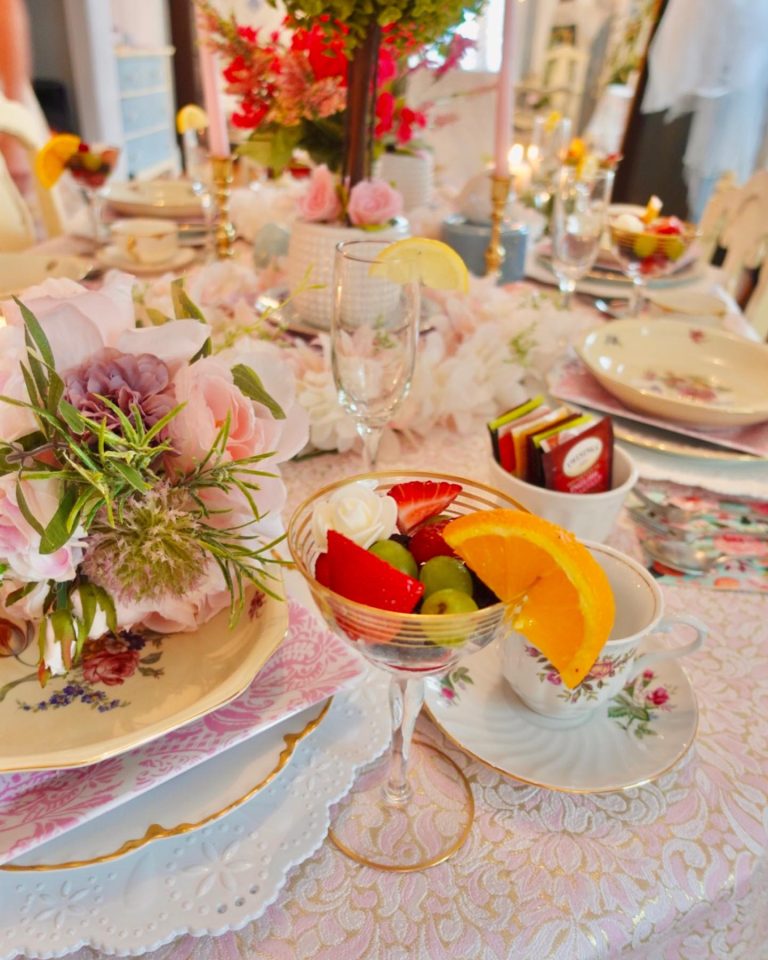
Seasonal Table Runner
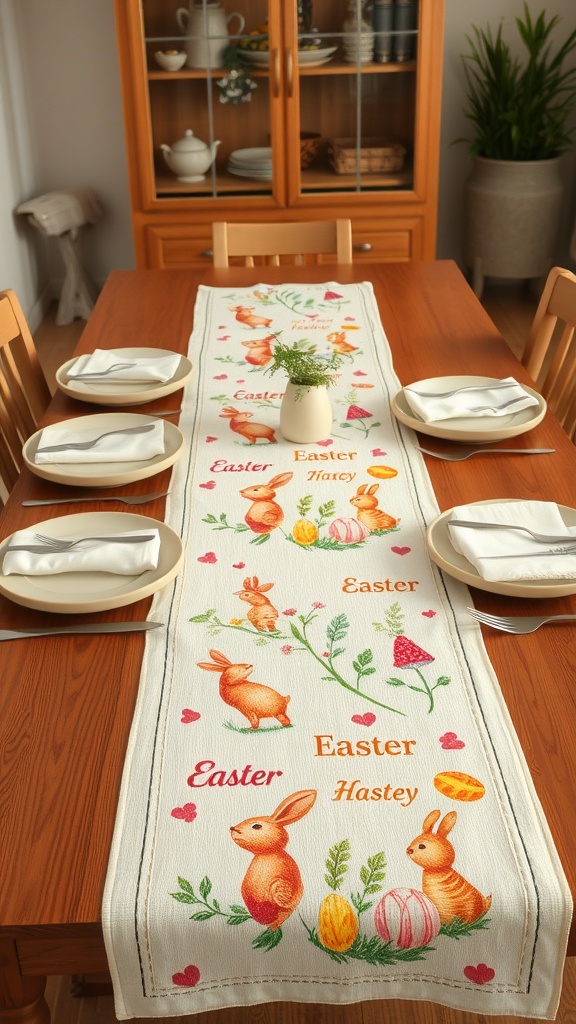
A seasonal table runner can completely transform your dining experience during Easter. The image showcases a bright and cheerful table runner adorned with playful bunnies, colorful eggs, and sweet floral designs. Each element brings a touch of spring to your table, making it feel festive and inviting.
Creating your own table runner is a fun and simple DIY project. You can choose fabric that reflects your personal style while incorporating vibrant colors that echo the spirit of Easter. Consider using cotton or linen for an easy-to-work-with material.
To make your runner, measure your table and cut your fabric to size, leaving a little extra for seams. Then, you can either paint or print your chosen designs directly onto the fabric or use fabric markers to add your own artistic flair. Once you’ve finished decorating, hem the edges to prevent fraying.
Your homemade table runner will not only enhance your Easter brunch but also serve as a lovely conversation starter with family and friends. Plus, it’s a delightful way to showcase your creativity.
Easter Egg Painting Party Setup
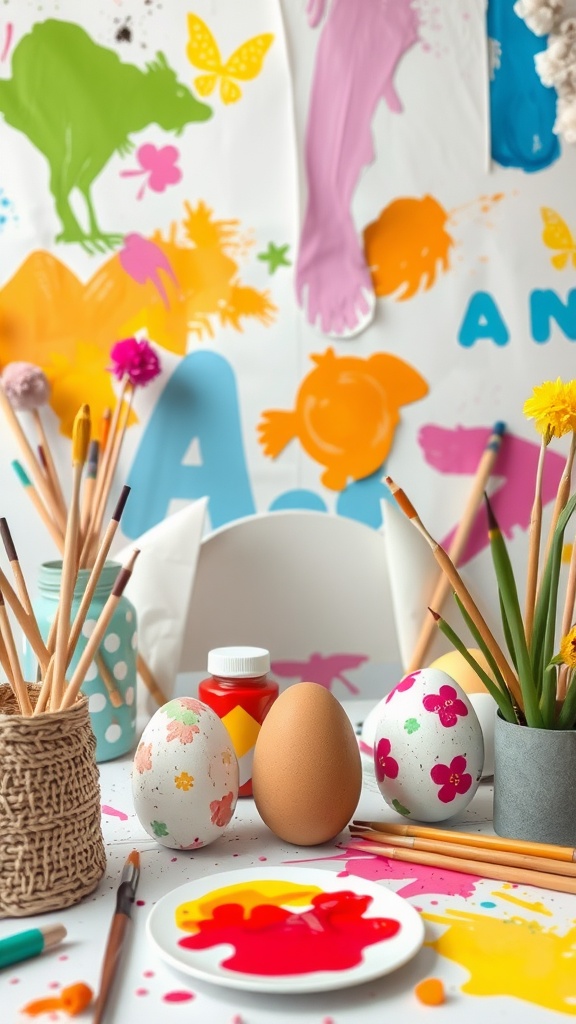
An Easter egg painting party is a fun way to celebrate the holiday. In the image, you can see a lively setup filled with colorful supplies and beautifully painted eggs. The table is bursting with creativity!
In the center, there are three eggs waiting for your artistic touch. Two are already painted with cheerful flowers, while the third is a classic brown egg, ready to be transformed. The vibrant colors on the plate suggest that there are lots of paint options available for everyone to experiment with.
The background features splashes of paint and playful designs, creating a festive atmosphere. You can spot paintbrushes in a jar, and other painting tools scattered around, making it easy for everyone to dive into their projects.
This setup encourages a casual and friendly environment, where creativity can flow freely. Gather your friends, set up some snacks, and enjoy a relaxing afternoon decorating eggs together!
Upcycled Easter Decorations
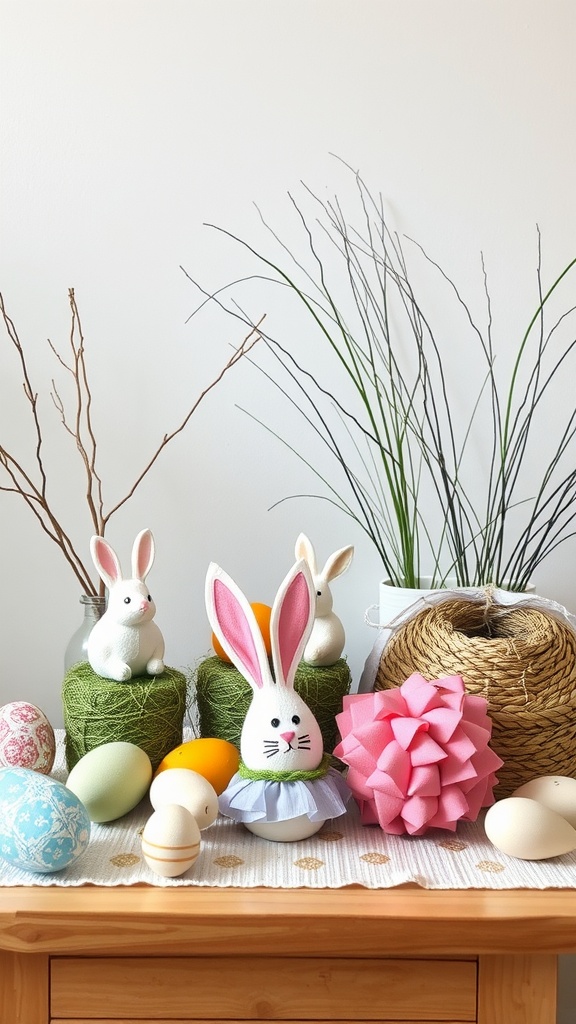
Upcycling is a fun way to add charm to your Easter decorations while being kind to the environment. This image showcases a delightful arrangement of upcycled items that inspire creativity. Notice the cute bunny figure dressed in a soft, pastel outfit, made from simple materials. It’s an excellent example of turning old items into something festive.
In the foreground, you’ll see a variety of colored eggs. These can be created from recycled materials like plastic bottles or egg cartons. A sprinkle of paint or some decorative paper can transform these everyday items into beautiful Easter eggs.
Surrounding the bunny are playful touches like the strands of yarn and twigs. These natural elements tie the whole display together, bringing a sense of spring inside your home. You can easily gather twigs from your yard and wrap them in yarn to create unique napkin holders or centerpieces.
All of these components encourage a hands-on approach to Easter decorations. Instead of buying new items, consider how you can repurpose what you already have. Upcycled Easter decorations not only save money but also add a personal touch to your holiday celebrations.
Easter Egg Garland
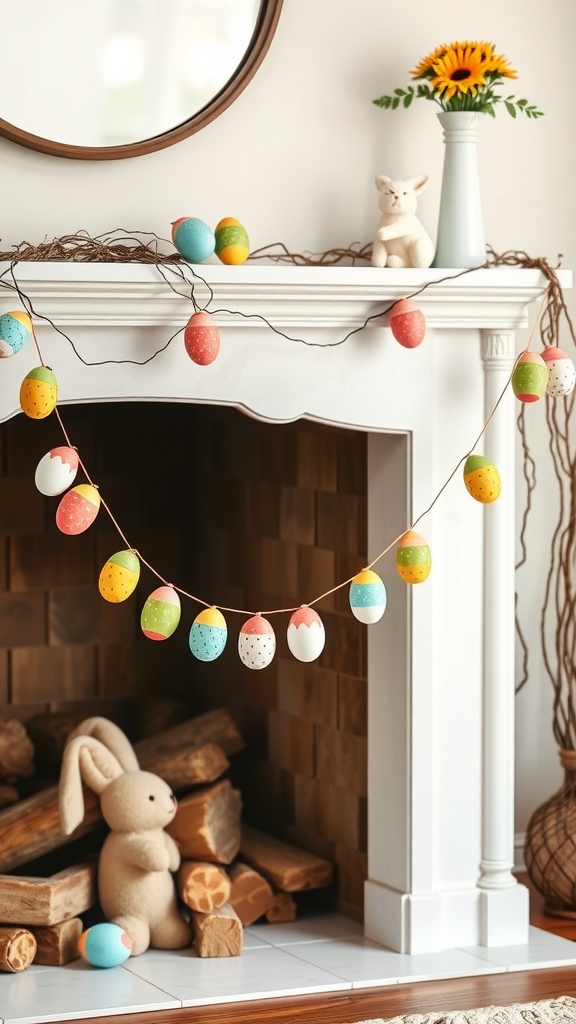
The Easter Egg Garland is a cheerful decoration that adds a festive touch to any home. In the image, colorful eggs dangle playfully across a mantelpiece, each one adorned with unique patterns and bright colors. This garland is not just a lovely visual display; it also invites a sense of joy and celebration during the Easter season.
Creating your own Easter Egg Garland can be a fun DIY project. Start by gathering materials like plastic or paper eggs, string or twine, and some paint or markers. You can even use stickers or washi tape for extra flair. Once your eggs are decorated and dry, simply poke a small hole in each one, thread them onto your string, and hang it up wherever you want to brighten the space.
This garland pairs beautifully with other spring decorations, such as fresh flowers or cute bunny figurines, just like the ones seen in this cozy setup. Whether you’re planning a gathering or just want to enjoy the season at home, making an Easter Egg Garland can be a delightful way to express your creativity and bring some color into your life.
Easter Themed Terrarium
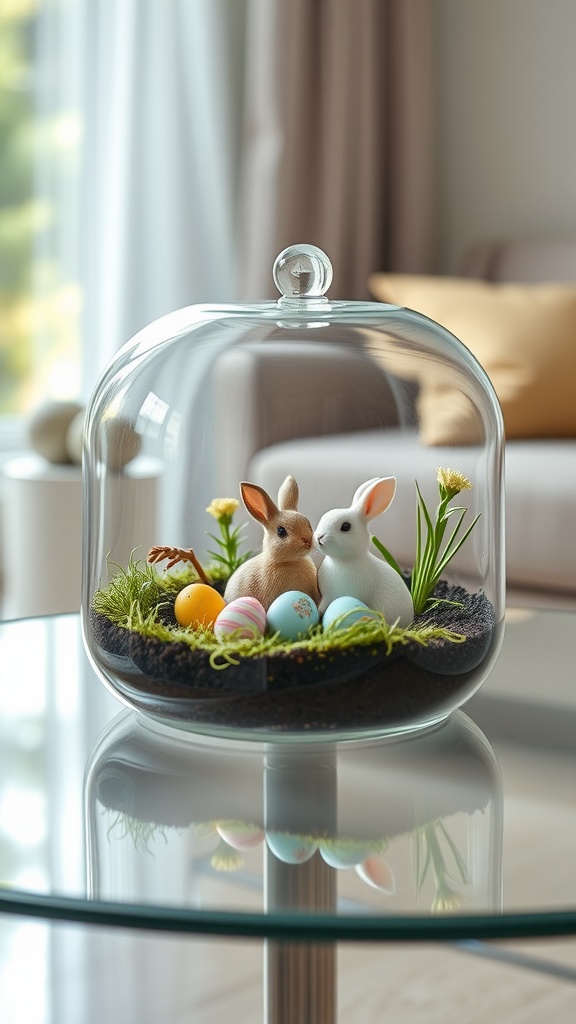
Creating an Easter-themed terrarium is a delightful way to celebrate the holiday. This charming project combines nature and art, making it a perfect DIY craft for adults. The image shows a terrarium under a glass dome, featuring two adorable rabbits and colorful Easter eggs nestled in soft moss.
The bunnies, one brown and one white, add a playful touch to the scene. Surrounding them are pastel-colored eggs, some with lovely patterns, enhancing the festive spirit. The greenery not only adds life but also provides a vibrant backdrop for the decorations.
Setting up your terrarium is simple. Start with a clear glass container, layer soil, and add moss for texture. Place your decorative elements, like the rabbits and eggs, and finish with additional plants or flowers. This craft not only brings an Easter vibe to your space but also serves as a lovely conversation piece.
DIY Easter Egg Bath Bombs
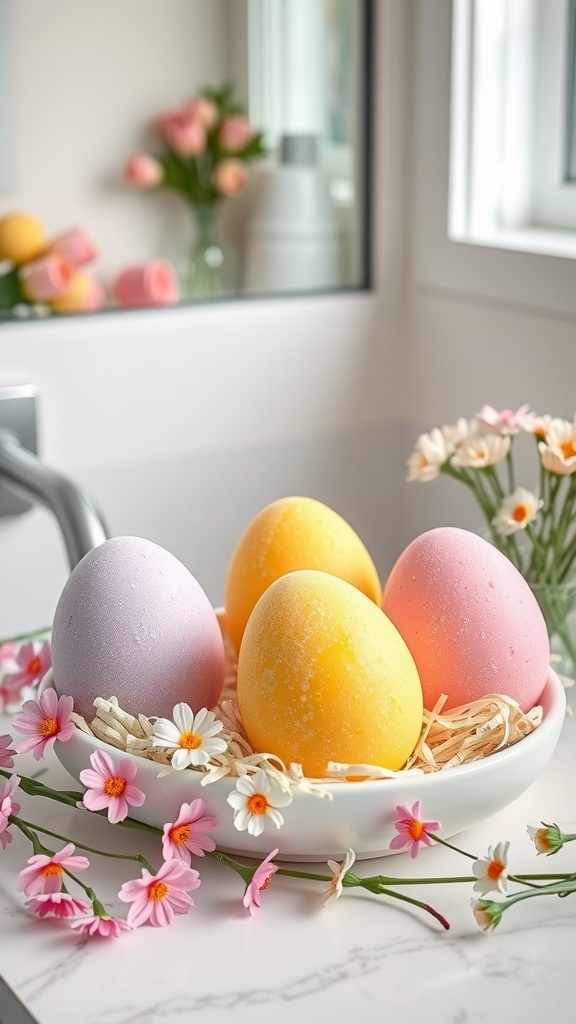
Creating DIY Easter Egg Bath Bombs is a fun way to celebrate the holiday while pampering yourself. These colorful bath bombs not only brighten up your bath time but also make for a lovely decoration. Picture a bunch of pastel-colored eggs nestled in a bowl, surrounded by delicate flowers. This charming setup reflects the spirit of spring and is perfect for the Easter season.
To get started with your own Easter Egg Bath Bombs, you’ll need some basic ingredients. Gather baking soda, citric acid, Epsom salt, essential oils, and food coloring. For an extra touch, you can add dried flowers or glitter.
Begin by mixing the dry ingredients in a bowl. In a separate container, combine the essential oils and food coloring. Slowly add the wet mixture to the dry ingredients, stirring until it holds together like damp sand. Press the mixture into egg-shaped molds tightly, allowing them to dry for a few hours.
Once they’re completely dry, pop them out of the molds and place them in a decorative bowl or gift them to friends. When dropped into a warm bath, these bath bombs fizz and release lovely fragrances, turning your soak into a delightful experience. It’s a simple and engaging project that adds an extra layer of joy to your Easter celebrations.
Pinecone Easter Bunnies
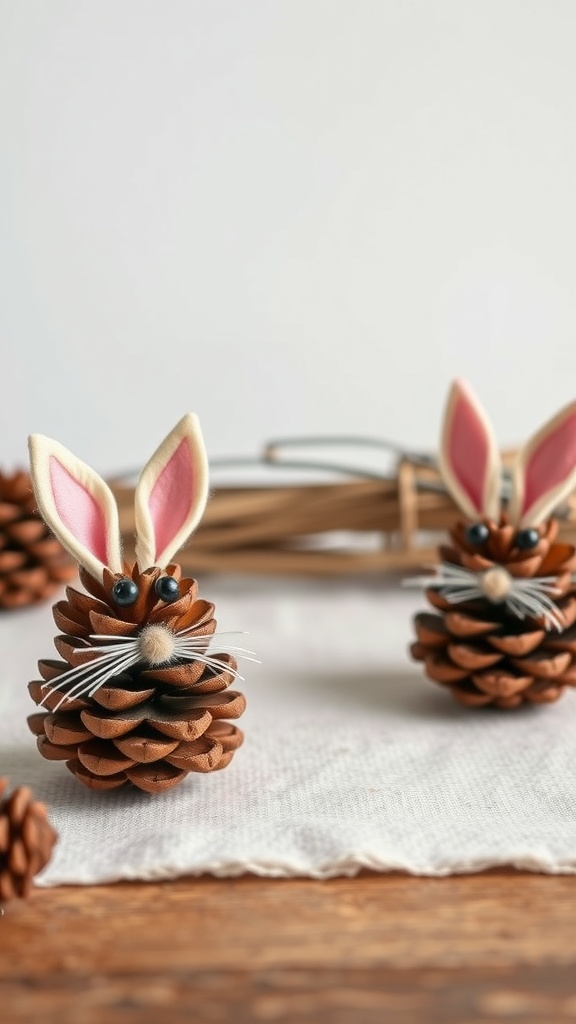
Pinecone Easter Bunnies are a fun and creative craft that brings a touch of nature into your holiday decor. These adorable little bunnies are made from pinecones, making them a delightful project to work on. Just look at how charming they are, with their fluffy tails and playful expressions!
To create these bunnies, you’ll need a few simple materials: pinecones, craft glue, googly eyes, and some felt for the ears. The process is straightforward and can be enjoyed by both individuals and groups. Start by gluing on the eyes and adding the felt ears to give each bunny its unique character.
Don’t forget to add whiskers! You can use some thin string or even pipe cleaners for this. Once finished, these pinecone bunnies can be displayed on your table or used as part of your Easter decorations. They are perfect for bringing a bit of springtime cheer into your home!
Whimsical Easter Egg Chairs
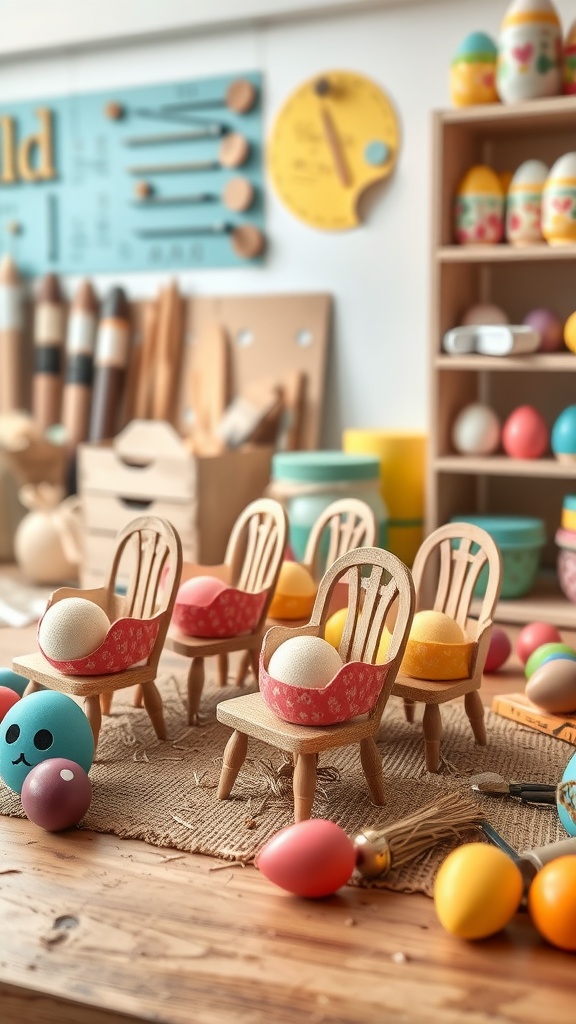
This delightful scene showcases a set of charming little chairs, each holding a colorful Easter egg. These mini chairs, crafted from wood, bring a playful vibe to any Easter celebration. They are painted in soft hues, perfectly complementing the vibrant eggs they cradle.
The setting feels warm and inviting, with various crafting tools and supplies scattered around, hinting at a creative workspace. The soft textures of the burlap beneath the chairs add a rustic touch, making the whole arrangement feel cozy. This craft not only adds a whimsical element to your decor but also encourages creativity.
Creating these Easter egg chairs is a fun project for adults looking to express their artistic side. You can use materials like small wooden chairs, paint, and decorative paper for the seat cushions. Just imagine how these unique pieces could brighten up your Easter gatherings or serve as charming centerpieces!
Easter-Themed Soap Making

Easter-themed soap making is a fun and creative way to celebrate the holiday. As you can see in the image, there are bunny-shaped soaps in soft pastel colors, which add a delightful touch to your Easter decor.
The tools around the soaps, like the cutting board, scissors, and molds, show that you don’t need much to get started. Making soap can be an enjoyable process, perfect for both individuals and groups looking for a fun activity.
To make your own Easter soaps, you’ll need a few simple ingredients. Start with a melt-and-pour soap base, which you can find at craft stores. Choose your favorite colors and scents to personalize your creations. You can also add ingredients like dried flowers or essential oils for a special touch.
Once you have your supplies, simply melt the soap base, mix in your colors and scents, and pour it into bunny-shaped molds. Let them cool and harden, and you’ll have adorable soaps that are perfect for gifts or your own Easter basket.
This activity not only adds a homemade element to your celebrations but also gives you unique, handmade items to enjoy or share with friends and family.